In Clio Manage, rate tables allow billing administrators to bill the same firm users differently by currency, client, matter type, or fee arrangement. Assign a rate table to a matter or contact from its billing preferences. The assigned rate then populates automatically when those users track time, unless a higher-priority rate in the rate hierarchy applies.
Understand rate tables
A rate table organises users, rates, and categories under a single billing currency, based on how your firm segments billing matters.
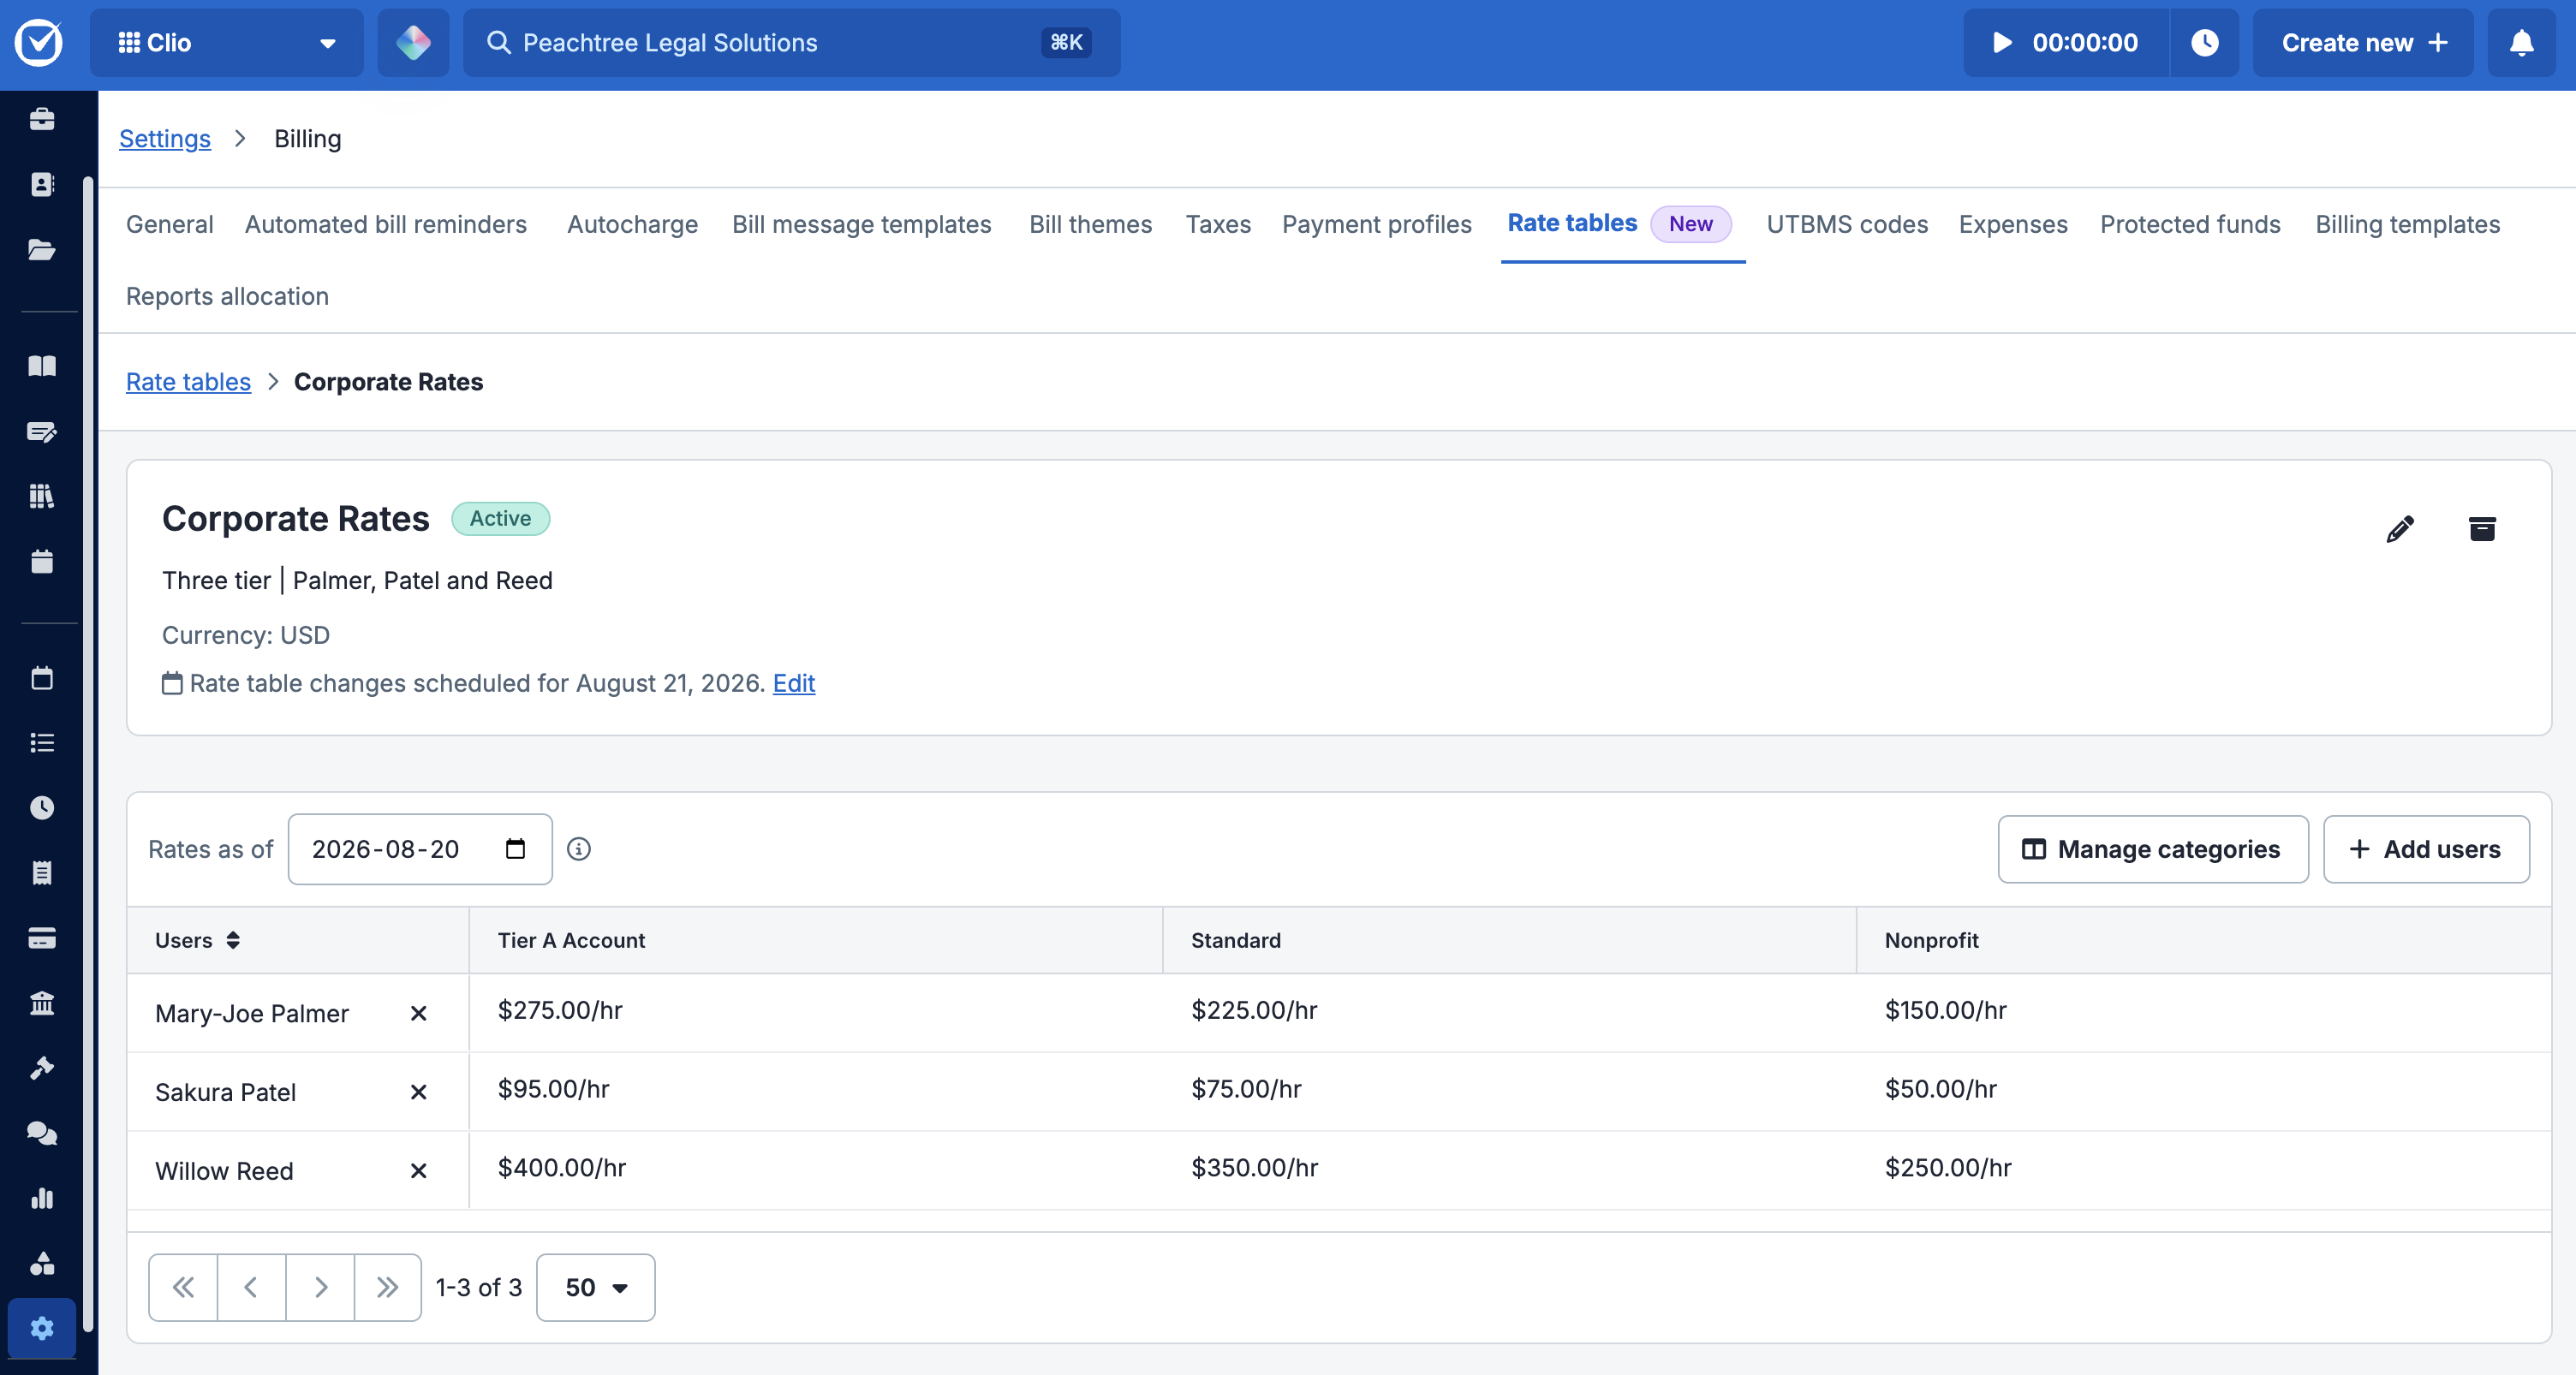
Rate categories are the tiers that make up a rate table. In Billing settings, a rate table displays as a grid. Each row lists a firm user, and each rate category adds its own column of rates for that user.
For example, create a Tier A Account category to bill high-volume institutional clients at a negotiated rate, and a Standard category to bill individual clients at the standard rate.
Note: Rate categories set rate tiers within a single rate table, while activity categories label the type of billable work performed, such as a court appearance or document review, and can carry their own rate. Rate tables integrate with Clio Manage's existing rate hierarchy, where an activity category rate overrides the rate set in a rate table.
Create new rate tables
You can create rate tables from Billing settings in Clio Manage, then add categories and users before assigning them to a contact or matter.
Tip: You can reopen Manage categories at any time after creating the table to edit the categories. You can drag a category by its handle on the left to reorder it, or click X to remove it.
- Go to Settings, click Billing, then click the Rate tables tab.
- Click New rate table.
- Enter a Table name, then select the Billing currency.
- Optional: Enter a Description.
- Click Create table.
- On the table's page, click Manage categories, then click + Add category.
- Click Update.
- Click + Add users, search for and select firm users, then click Add users.
- To remove a user from the table, click the X in the Users column.
- Hover over a user's row within a category column, and click to enter the rate.
Manage existing rate tables
Once you create a rate table, you can edit rate categories, archive a table you no longer use, and unarchive a table to reuse it.
Tip: Billing administrators can schedule future rate changes and track rate changes over time.
Edit rate table categories
- Go to Settings, click Billing, then click the Rate tables tab.
- Under the name column, click the blue hyperlink to open the rate table.
- Click Manage categories to edit rate categories.
- Click the X next to a user's name to remove them from the table.
Archive a rate table

- Go to Settings, click Billing, then click the Rate tables tab.
- Click the archive icon for the table.
- From the Rate tables list, click the icon in the Actions column.
- Or, open the table, then click the icon next to its name.
- Click Archive to confirm.
Unarchive a rate table
- In the Actions column for the archived table, click Unarchive.
- Click Unarchive to confirm.
Assign a rate table to a matter or contact
You can assign a rate table and rate category when editing a matter from the Billing preference section. Rate table and Rate category are separate fields: Rate table lists the tables available in the matter's billing currency, and Rate category lists only the categories that exist within the selected table. You will need to select a rate category after selecting a rate table.
Note: Rate tables are separate from custom billing rates in the same panel, which sets a rate directly on a matter for one or more users.
- In Clio Manage, go to a matter and click Edit matter.
- Or, go to a contact and click Edit contact.
- Go to the Billing preference section.
- Select a Rate table.
- Select a Rate category within that table
- Click Save matter.
Update rate assignments in bulk
You can update the rate table or category for multiple matters from the Matters tab, instead of opening each matter individually.
Important: This bulk update replaces any existing rate table assignment on the selected matters. It does not merge with or preserve previous assignments.
- Go to Matters.
- Select the matters you want to update.
- Open the bulk actions menu and choose Update rate table & category.
- Select the rate table and category to apply.
- To save, click Update rate table category.
Track rate changes over time
The Rates as of field above the rate grid controls the date you view or set, and defaults to today. You can choose a past date to view rate history, or set a future date to schedule a rate change. When creating or viewing a time entry, the Rate field displays the applied rate and category, so timekeepers can confirm they are billing at the intended rate before the entry is finalised.
To schedule a rate change for a future date:
- In the Rates as of field, select a future date to switch to the scheduling view.
- Enter the new rate for each user and category you want to change.
- Click Done scheduling rates to confirm.
Tip: A complete, dated record of past and current rates supports accurate, defensible bills if a client or bar association ever questions how a fee was calculated.
Up next
- Rates and Rate Hierarchies: See where a rate table ranks against custom, matter-based, and other existing rate types.
- Time Entries: See how the applied rate and category display on a time entry.