In Clio Manage, protecting client trust funds lets you set aside specific fund amounts for future use, such as covering counsel fees, expenses, or future invoices. Managing trust funds involves numerous industry regulations, and your firm may need strict control over them. Protected funds are set aside from the available matter balance and remain available only for the purpose you reserve them for. With funds protected, your firm keeps clear control over how client money is used.
Note: Only administrators can enable the protected trust funds setting. Once enabled, users with Accounts permissions can add, edit, or delete protected funds or apply them to invoices. Other firm users can view protected funds, make edits, and send requests to users with Accounts permissions to release protected funds. Learn more about Roles and Permissions in Clio Manage.
Enable the protected funds setting
Before getting started with protected client funds, an administrator on the firm account needs to enable the setting.
- Go to Settings > Billing.
- Select Protected funds.
- In the Protected matter funds section, turn the toggle to the on position.
Manage protected funds
With Accounts permissions, you can add, edit, or delete protected funds from a matter's Dashboard, or apply protected funds to an invoice from the main Billing tab or the Bills subtab in a contact or matter. Changes to protected funds are recorded in the matter's Timeline, which shows the user, date, and time.
Note: You can protect funds when the client has available trust funds. Add trust funds by creating a trust request and recording a payment.
- Go to a matter.
- In the Dashboard subtab, open the Financial section and go to the Matter trust funds box.
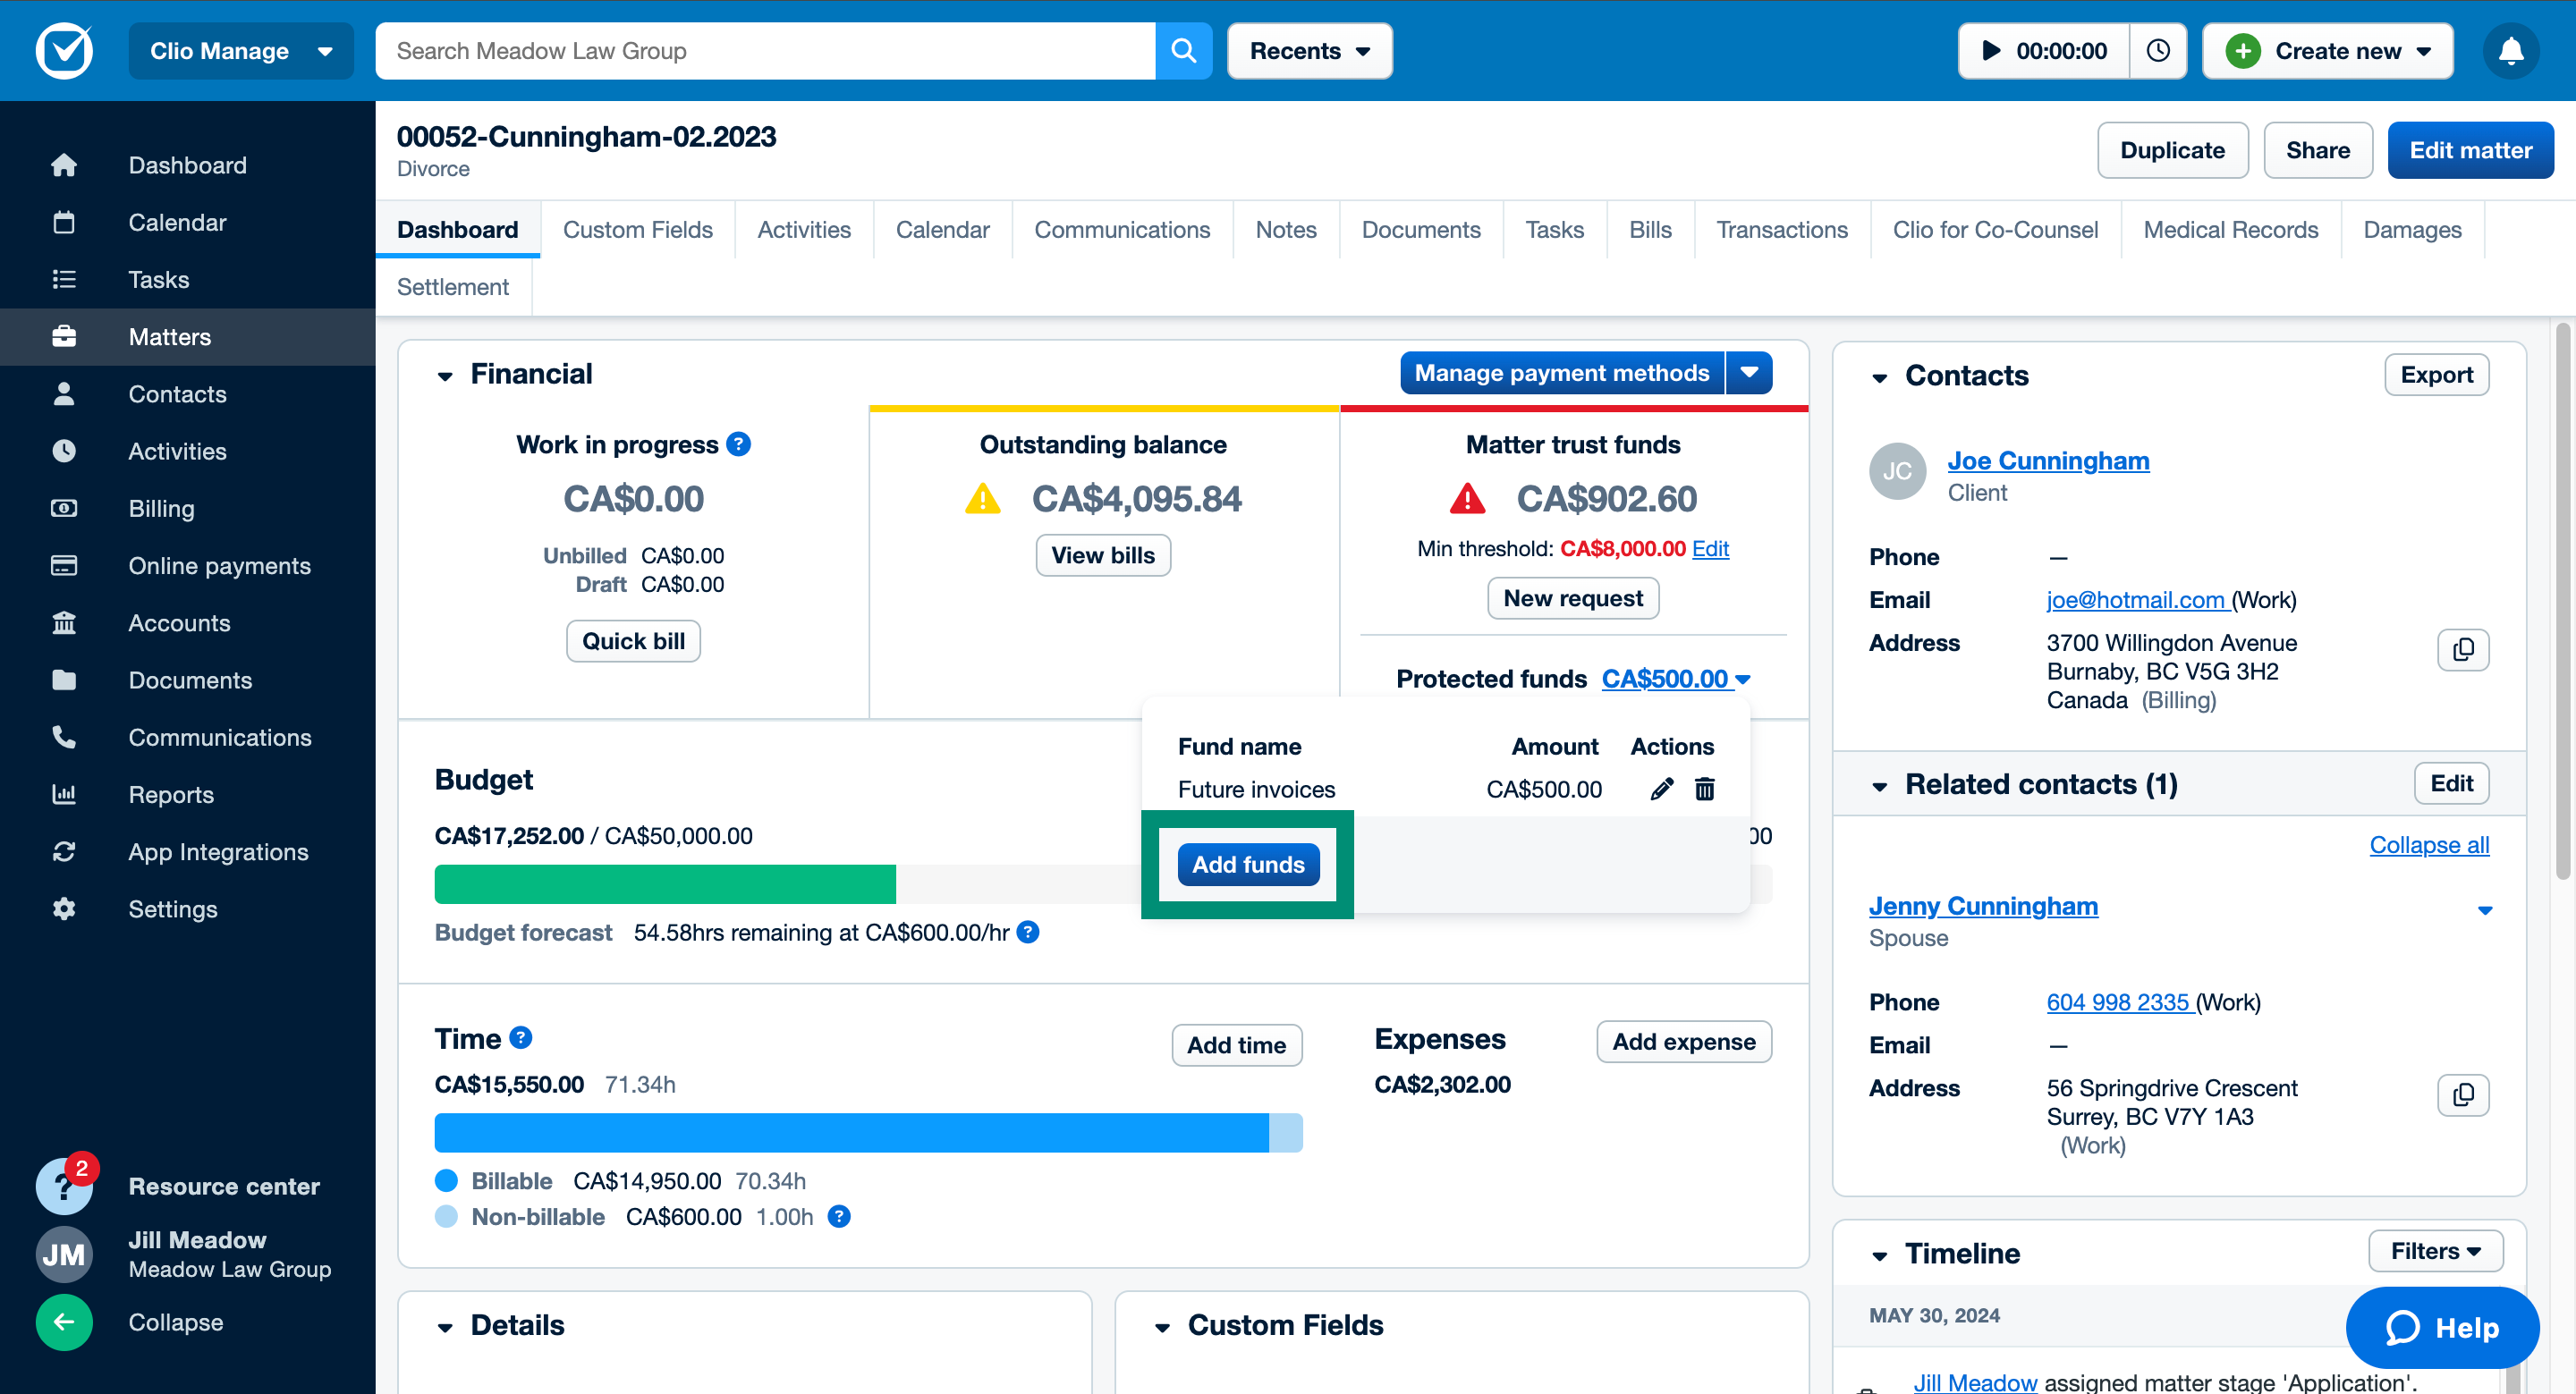
- If this is the first time you are protecting funds for this matter, click Add next to Protected funds. If you already added protected funds to this matter, click the protected funds total and then click Add funds.
- If applicable: If trust funds are held in more than one trust account, a Bank account field appears in the modal. Select the relevant trust account.
- Enter the amount you want to protect and add a protected fund name for easy future reference.
- Click Add.
The amount of the trust funds you protected is subtracted from the total amount of available trust funds on the matter. You can view the protected funds by clicking the amount of the protected funds in the Matter trust funds box.
- Go to a matter.
- In the Dashboard subtab, open the Financial section.
- In the Matter trust funds box, click the protected funds total next to Protected funds.
- Click the pencil icon representing Edit to edit a protected fund.
- Make any changes to the amount or fund name/reason, and then click Save changes.
Note: The trust account selected when you first protected the funds is fixed. To use a different account, delete the protected funds and recreate them with the correct account.
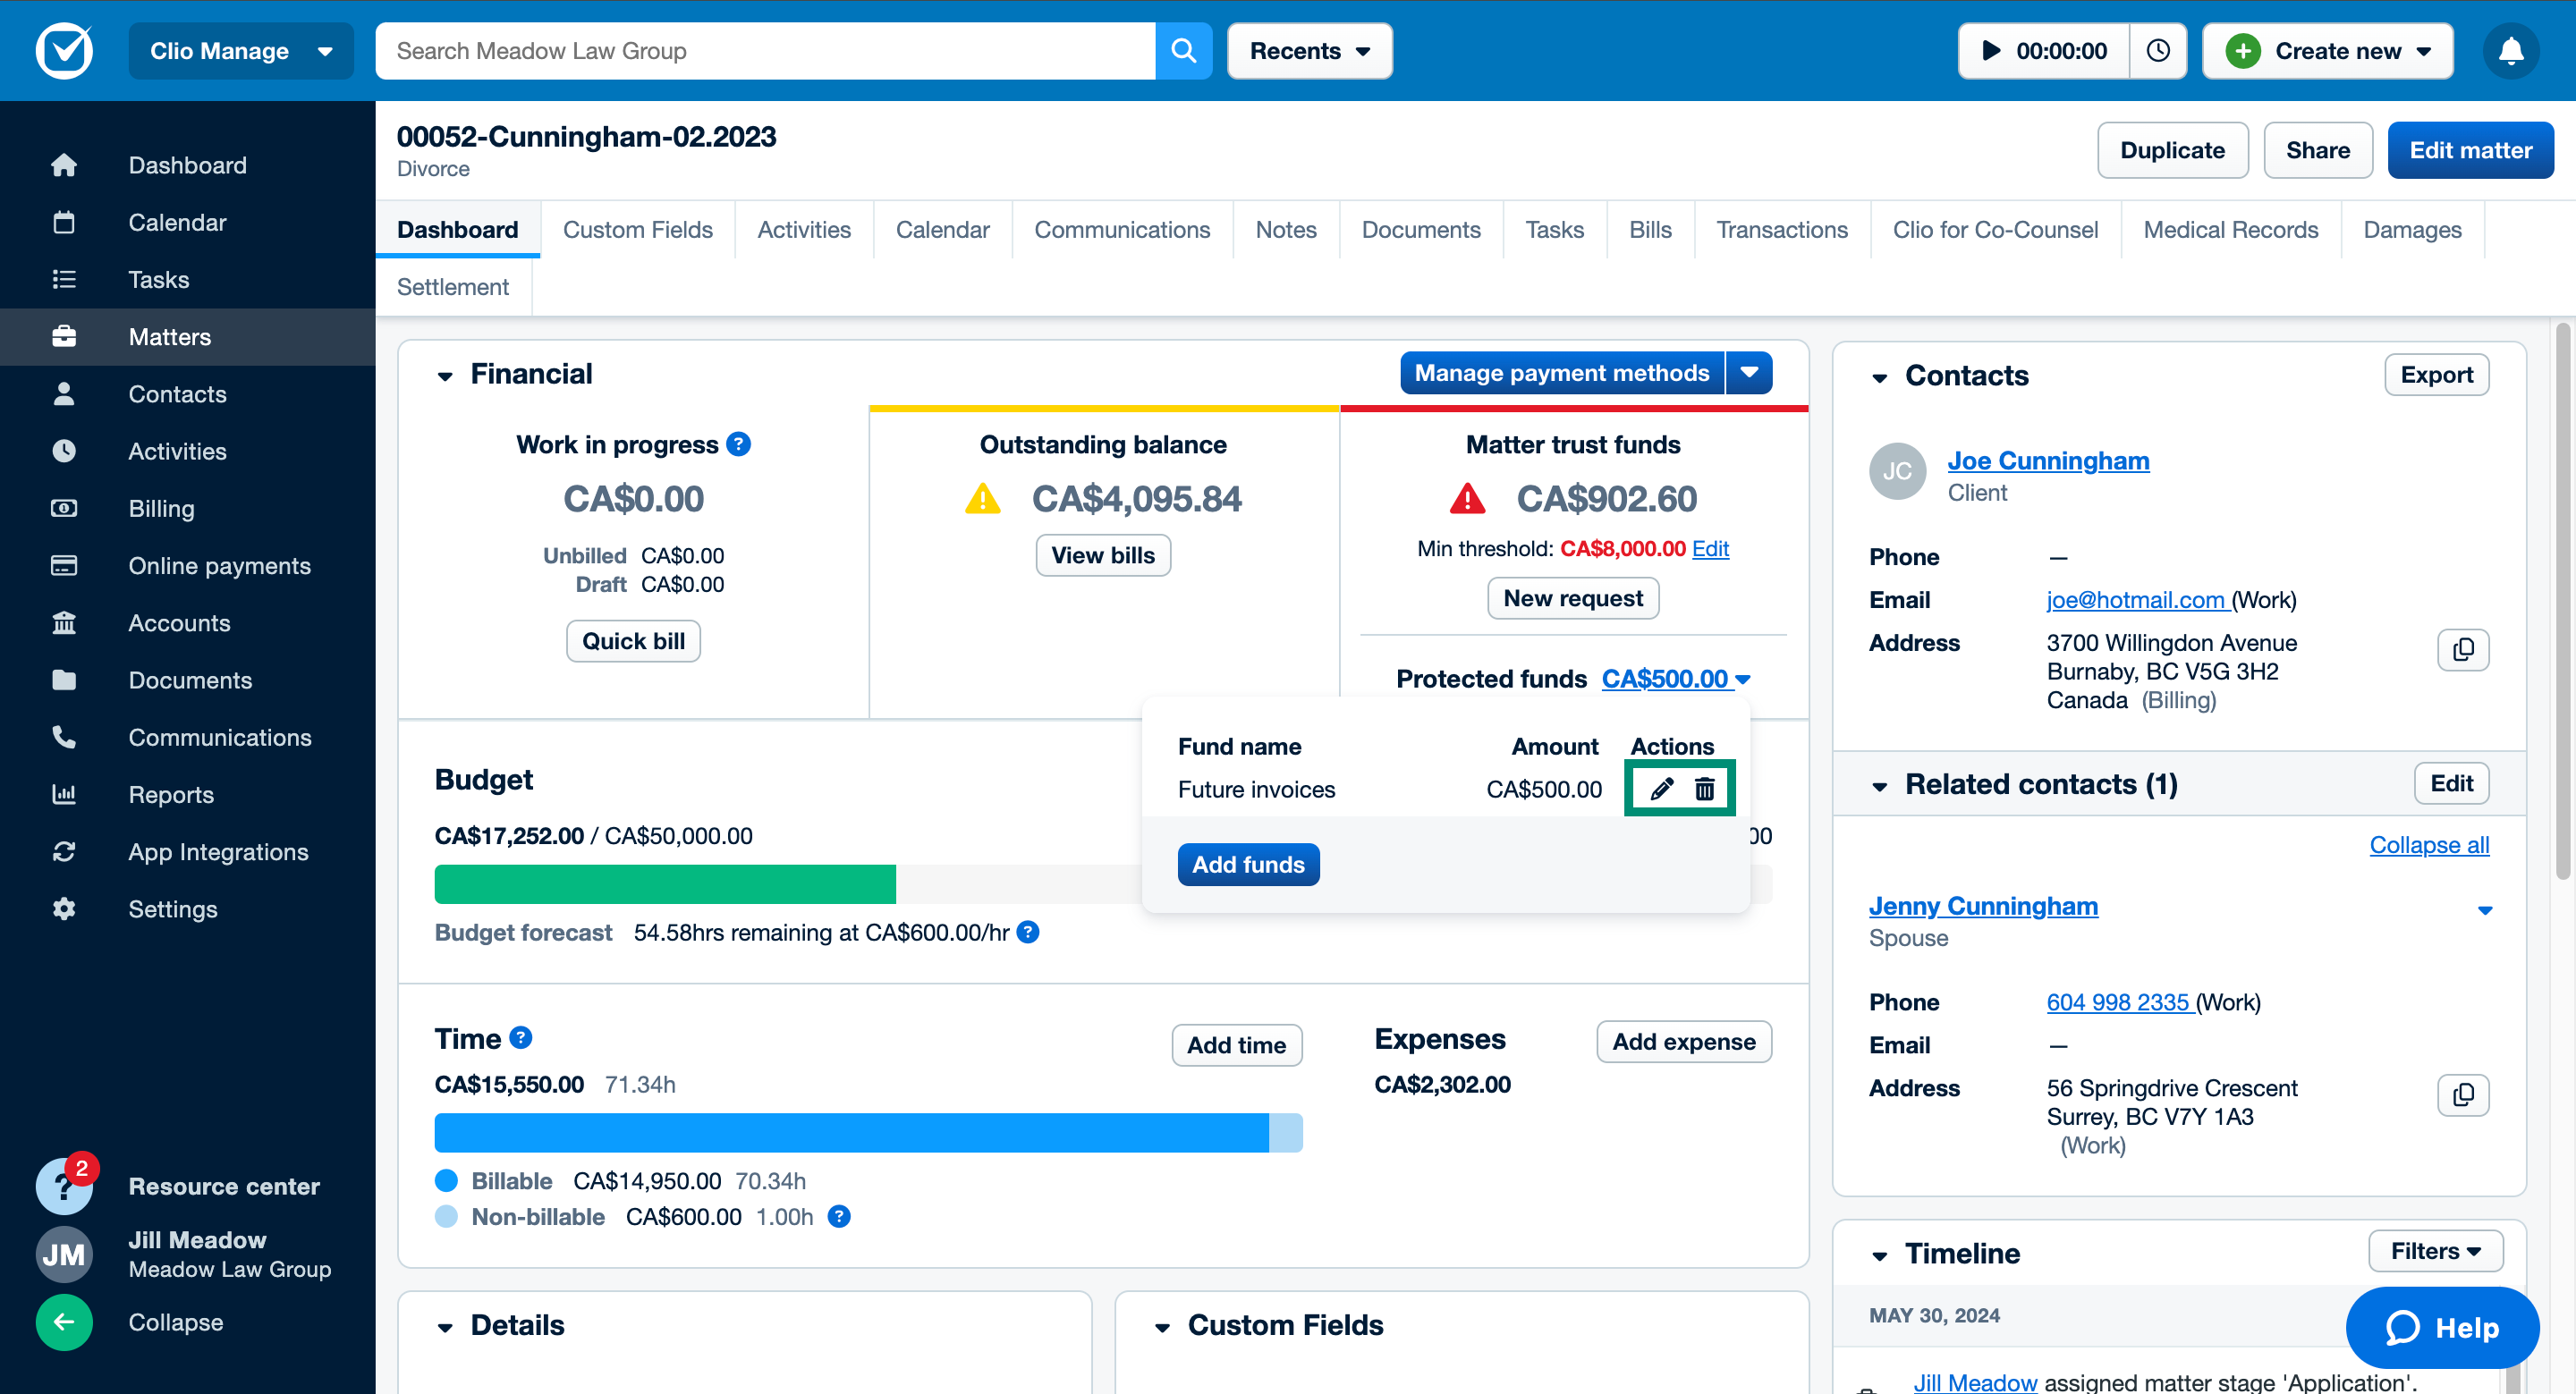
Important: Deleting protected funds removes the protection and returns the amount to the available matter trust balance. It does not delete the funds from the matter.
- Go to a matter.
- In the Dashboard subtab, open the Financial section.
- In the Matter trust funds box, click the protected funds total next to Protected funds.
- Click the trash can icon representing Delete to unprotect a fund.
- Click Delete to confirm.
- Go to the main Billing tab or the Bills subtab in a contact or matter.
- Find the invoice that you want to apply the protected funds to. Use the quick filters to find invoices that have not been paid yet, or use the keyword search box.
- Click the down arrow next to Send and then select Apply protected funds.
- Select the account that the protected funds will go into and the protected fund that you want to use to pay the invoice. If the client has only one protected fund, it is pre-selected.
- Click Apply funds.
Work with protected funds
Without Accounts permissions, you can view all protected funds for a matter, edit the reason for currently protected funds, and increase the amount of a protected fund. Changes to protected funds are recorded in the matter Timeline, which shows the user, date, and time.
You can also send a request to users with Accounts permissions to release protected funds back to the client or to pay an invoice. When you send the request, all users with Accounts permissions receive an email notification.
- Go to a matter.
- In the Dashboard subtab, open the Financial section.
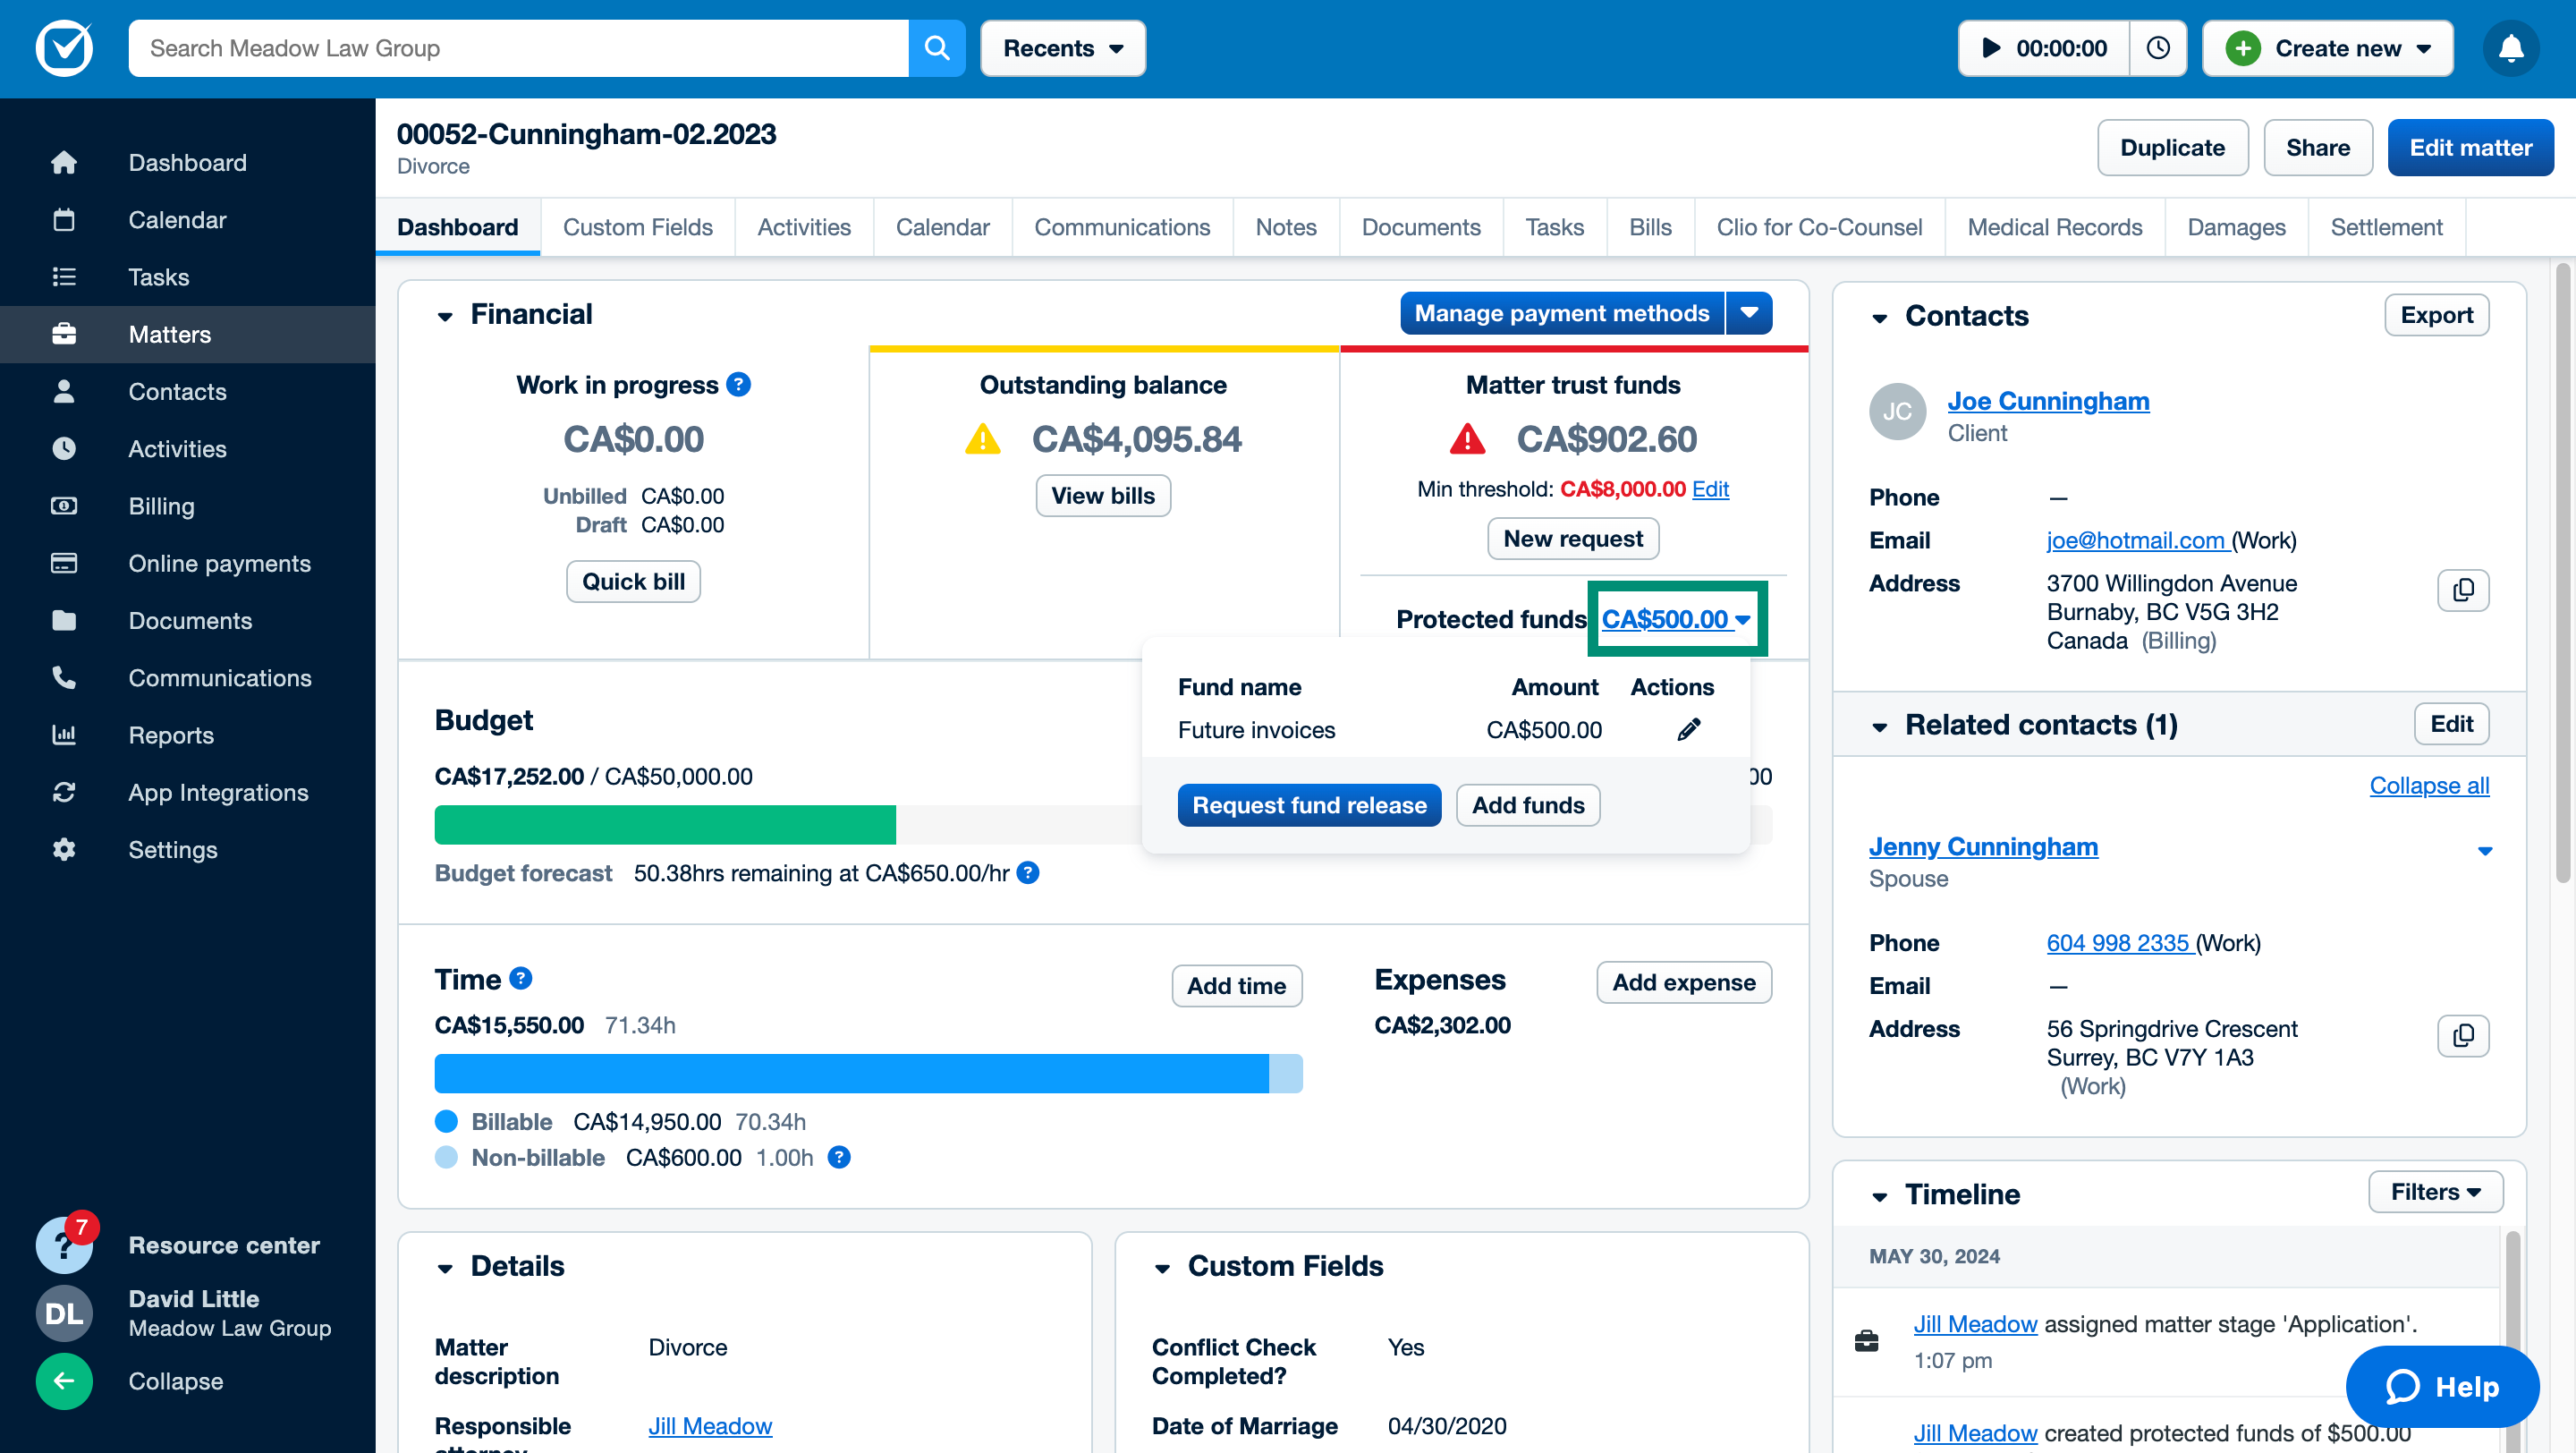
- In the Matter trust funds box, click the protected funds total next to Protected funds to view all protected funds for the matter.
- Go to a matter.
- In the Dashboard subtab, open the Financial section.
- In the Matter trust funds box, click the protected funds total next to Protected funds.
- Click the pencil icon representing Edit to edit a protected fund.
- Increase the amount or change the reason, and then click Save changes.
- Go to a matter.
- In the Dashboard subtab, open the Financial section.
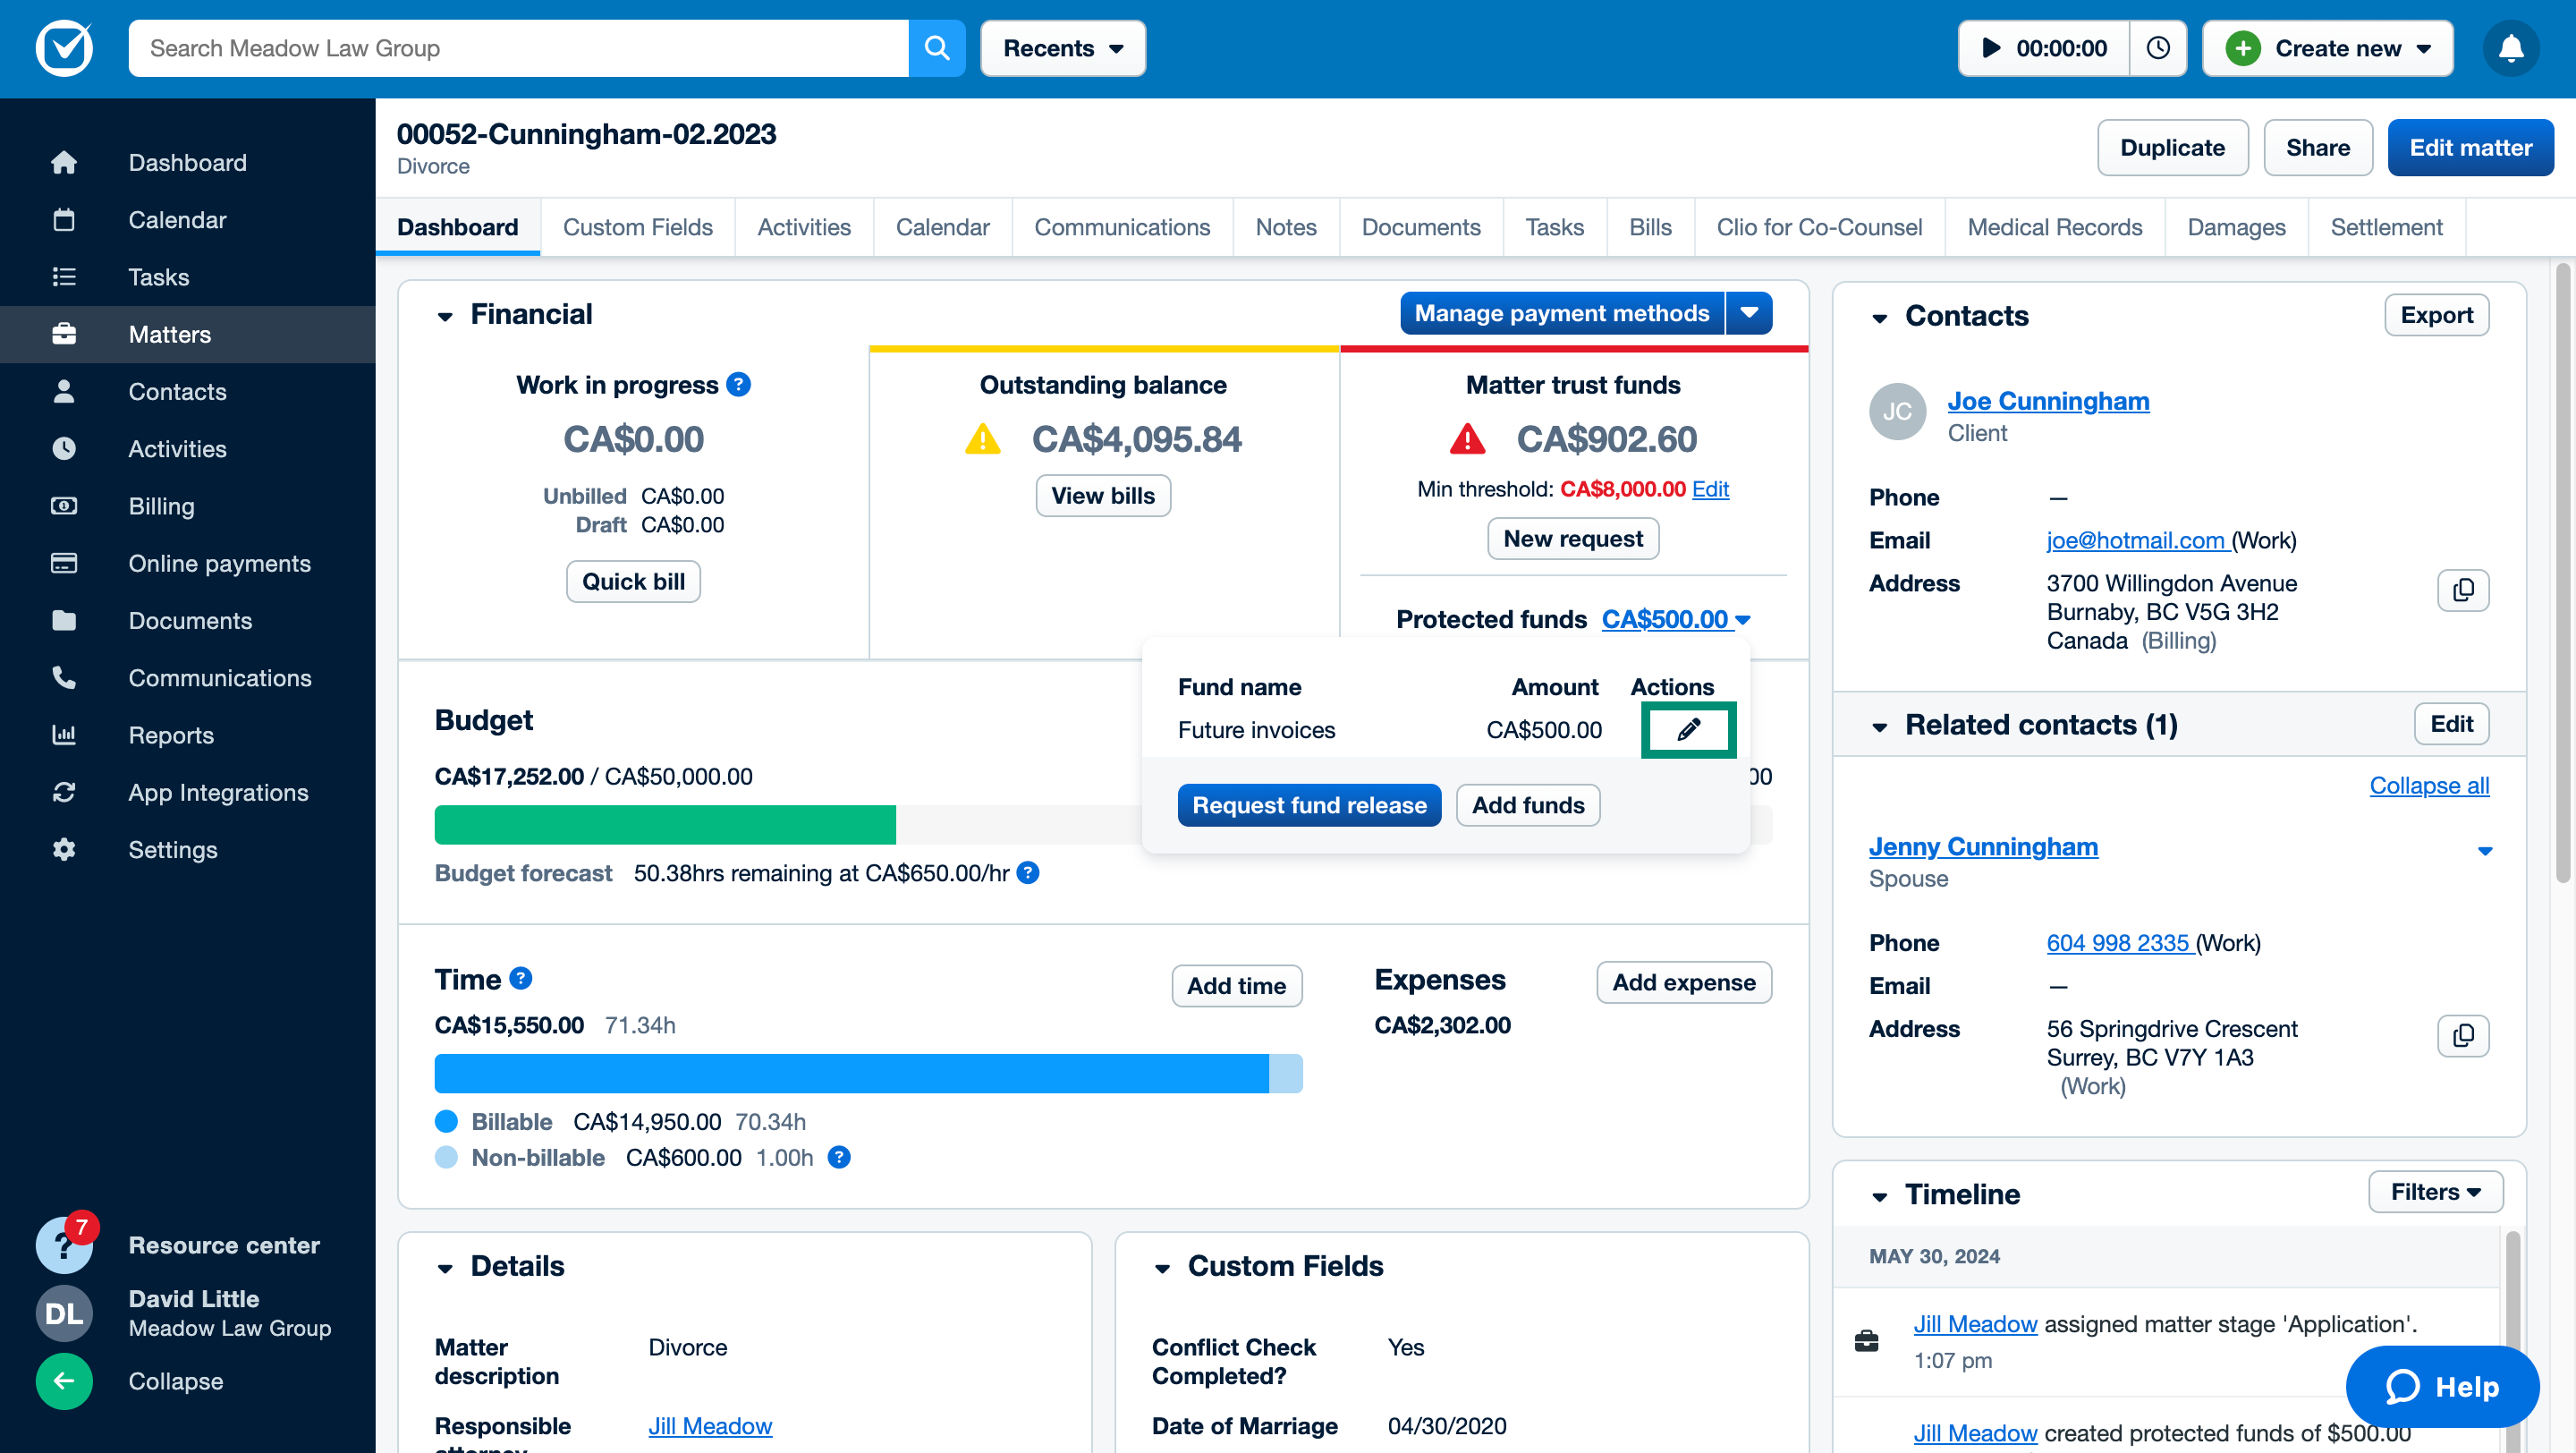
- In the Matter trust funds box, click the protected funds total next to Protected funds.
- Click Request fund release.
- Select the protected fund and the reason for requesting the release. Under Reason, select Release back to the client or Pay an invoice. If you select Pay an invoice, also select the invoice to pay.
- Optional: Enter a memo to add more details about the release request.
- Click Request fund release.

Up next
- Approve and Send Trust Requests: Approve a trust request and send it to your client.
- Manage Trust Requests: Sort, filter, edit, delete, or void trust requests.